

You don’t need a $28,000 kitchen remodel to make your home worth more. The best DIY home improvement projects that add value cost under $500, take a weekend or less, and fix exactly what buyers notice first: dated fixtures, tired paint, worn caulk and a weak first impression from the street.
The data backs this up. In the 2025 Cost vs. Value Report, a garage door replacement returned 268% of its cost and a steel entry door returned 216%, while an upscale kitchen remodel recovered only about half its cost (Opendoor summary of the report). Small, visible, well-finished upgrades beat expensive, personal ones.
This guide gives you 25 projects sorted by budget: under $100, under $500, weekend projects up to $2,000, and smart or energy-saving upgrades. Every project lists its cost, time, difficulty and why it adds value, so you can pick the right ones whether you’re selling next spring or staying for ten years.
(Prices are typical US retail ranges for 2026 and vary by region and brand.)
Quick answer: which DIY projects add the most value?
The DIY projects that add the most value are the ones buyers see first and judge fastest: fresh neutral paint, a clean front entry, updated light fixtures and hardware, new caulk and grout, and a tidy yard. Small kitchen and bathroom refreshes come next, followed by energy upgrades that lower monthly bills.
| No | Project | Typical DIY cost | Time | Main value it adds |
| 1 | Recaulk tub, shower and sinks | 15–40$ | 2–3 hours | Removes a “neglected home” signal |
| 2 | Clean, repair and seal grout | 20–60$ | Half day | Bathrooms look newer in photos |
| 3 | Replace switch plates and outlet covers | 30–100$ | 2 hours | Whole-house update for little money |
| 4 | Switch every bulb to LED | 40–100$ | 1 hour | Brighter rooms, lower bills |
| 5 | Weatherstrip doors and windows | 20–80$ | Half day | Fewer drafts, lower energy use |
| 6 | Paint the front door, add new house numbers | 50–100$ | 1 day | Stronger first impression |
| 7 | Pressure wash siding, driveway and deck | 50–100$ (rental) | 1 day | Big curb appeal lift |
| 8 | Clean gutters, add downspout extensions | 20–60$ | Half day | Protects foundation and roof |
| 9 | Paint rooms in neutral colors | 100–250$ per room | 1–2 days per room | Move-in-ready look |
| 10 | Replace cabinet hardware | 100–400$ | 2–4 hours | Kitchen looks updated |
| 11 | Swap dated light fixtures | 100–400$ | 1–2 hours each | Modern feel, better photos |
| 12 | Replace kitchen or bath faucets | 100–350$ | 2–3 hours each | Fixes drips, updates finish |
| 13 | Upgrade window treatments | 100–500$ | Half day | Rooms feel finished |
| 14 | Install a tile or peel-and-stick backsplash | 150–500$ | 1 weekend | Kitchen refresh without a remodel |
| 15 | Refresh landscaping: mulch, edging, plants | 150–500$ | 1 weekend | Curb appeal |
| 16 | Give the garage door a facelift | 100–300$ | 1 day | Highest-ROI area of the home |
| 17 | Paint kitchen cabinets | 200–600$ | 3–5 days | Biggest kitchen change under $1,000 |
| 18 | Install luxury vinyl plank flooring | 600–2,000$ per room | 1–2 weekends | Replaces worn carpet |
| 19 | Replace a bathroom vanity | 400–1,500$ | 1 weekend | Bathroom refresh without a remodel |
| 20 | Add attic insulation | 500–1,500$ | 1 weekend | Lower heating and cooling bills |
| 21 | Add closet and garage storage systems | 300–1,000$ | 1 weekend | Buyers pay for storage |
| 22 | Install a smart thermostat | 100–280$ | 1 hour | Energy savings, modern feature |
| 23 | Add a video doorbell and smart lock | 150–400$ | 2 hours | Security buyers look for |
| 24 | Add smart dimmers and motion exterior lights | 100–400$ | Half day | Convenience and security |
| 25 | Install water leak sensors or a smart shutoff | 50–500$ | 1–3 hours | Prevents costly water damage |
What makes a DIY project actually add value?
A DIY project adds value when it makes a home look cared for, move-in ready and cheaper to run. Buyers rarely pay extra for your taste, but they always discount for problems they can see.
Three tests decide whether a project is worth your weekend:
- Does a buyer notice it in the first 60 seconds? Front door, paint, lighting, kitchen hardware and bathroom caulk all pass. A new water softener does not.
- Does it remove a maintenance worry? In Clever’s 2024 American Home Buyer Report, the most common regret among recent buyers was that the home needed too much maintenance, cited by 28% (Clever Real Estate). Fixing small defects before they’re noticed protects your asking price.
- Can you finish it to a professional standard? A half-finished or sloppy DIY job lowers value. Choose projects at your skill level and leave the rest to licensed pros (see the “leave to the pros” section below).
Keep one more point in mind: appraised value and buyer perception are different things. An appraiser mostly compares your home with recent nearby sales, so a $300 hardware swap won’t change the appraisal line by line. What it changes is how fast buyers make an offer and how hard they negotiate. Opendoor’s analysis puts it bluntly: buyers discount for problems but rarely pay a full premium for upgrades (Opendoor).
That’s why every project in this list is cheap, visible, or both.
DIY projects under $100
These eight projects cost less than a dinner out and fix the small defects that make buyers assume bigger problems. Do all of them before you start anything larger.
1. Recaulk the tub, shower and sinks
Yellowed, cracked or moldy caulk is one of the first things buyers and inspectors notice in a bathroom. Fresh white caulk makes an old tub look clean and well kept.
- Cut out the old caulk with a utility knife or caulk removal tool.
- Clean the joint with rubbing alcohol and let it dry fully.
- Run painter’s tape on both sides of the joint for a straight line.
- Apply 100% silicone kitchen-and-bath caulk, smooth it with a wet finger, and pull the tape before it skins over.
Note: Fill the tub with water before caulking. The weight opens the joint to its widest, so the bead won’t crack when someone bathes.
2. Clean, repair and seal the grout
Dirty grout makes good tile look old. Scrub it with an oxygen bleach cleaner and a stiff brush, replace any cracked or missing grout with a grout saw and premixed grout, then apply a penetrating sealer. For stained grout that won’t come clean, a grout color sealant (sometimes called grout paint) gives it a uniform new look.
3. Replace switch plates and outlet covers
Cracked, painted-over or almond-colored covers quietly date a home. Matching new covers cost a few dollars each and only need a screwdriver. This was one of Investopedia’s original low-cost tips, and it still holds up because it touches every room.
Note: Count every switch and outlet first and buy one style and color for the whole house. Consistency is what makes it look like an upgrade.
4. Switch every bulb to LED
According to the US Department of Energy, residential LEDs, especially ENERGY STAR rated ones, use at least 75% less energy and last up to 25 times longer than incandescent bulbs. Bright, even lighting also makes rooms look bigger in listing photos.
Note: Use one color temperature per room. 2700K–3000K (warm white) suits living areas and bedrooms; 3500K–4000K suits kitchens, bathrooms and garages. Mixed color temperatures look careless.
5. Weatherstrip doors and windows
Drafty doors and windows waste energy and feel cheap. Replace worn foam or rubber strips, add a door sweep to exterior doors, and seal gaps around window trim with paintable caulk. You’ll feel the difference on the first cold or hot day.
6. Paint the front door and add new house numbers
The front door is the focal point of every listing photo. One quart of exterior door paint, a new kick plate or modern house numbers, and a clean doormat change how the whole house feels. Classic choices like black, navy or deep green suit most homes.
7. Pressure wash the siding, driveway and deck
Years of dirt, mildew and oil stains disappear in an afternoon. Use a low-pressure setting and a wide tip on siding and wood, and never point the spray up under siding laps or at windows.
Note: Test the spray on a hidden spot first. Too much pressure can etch soft wood and strip paint.
8. Clean the gutters and add downspout extensions
This doesn’t add value so much as protect it. Clogged gutters overflow, rot fascia boards and send water toward the foundation, all of which show up on inspection reports. Clear the gutters, flush the downspouts, and add extensions so water lands at least 4–6 feet from the house.
Safety: Use a stable ladder with a stabilizer arm, keep three points of contact, and skip this one on a two-story roofline if you’re not comfortable at height.
DIY projects under $500
This is the sweet spot for DIY value. Each project below changes how a room looks in photos and in person, and none needs a contractor.
9. Paint rooms in neutral colors
Fresh paint is the single most recommended pre-sale project because it makes a home feel clean and move-in ready. Bold or dark colors make buyers mentally add “repaint” to their cost list. Soft whites, warm greiges and light grays photograph well and suit any furniture.
- Fill nail holes and dents with spackle, sand smooth, and wipe the walls down.
- Cut in edges with an angled brush, then roll the walls in a “W” pattern.
- Use two coats of a quality paint-and-primer. One gallon covers roughly 350–400 square feet per coat.
- Use eggshell or satin for walls, semi-gloss for trim and bathrooms.
Note: Paint the ceiling too if it’s yellowed. A bright white ceiling makes any room feel taller.
10. Replace cabinet hardware
New pulls and knobs are the fastest way to update a kitchen without touching the cabinets. Matte black, brushed brass and brushed nickel are safe, current finishes.
Note: Measure the hole spacing (center-to-center) of your existing pulls before you shop. Buying the same size means no new holes to drill or patch. If you do change sizes, use a cabinet hardware jig for perfect alignment.
11. Swap dated light fixtures
Brass boob lights, frosted domes and builder-grade bathroom bars date a home instantly. Replacing a fixture on an existing electrical box is a common DIY job: turn off the circuit breaker, confirm the power is off with a non-contact voltage tester, and connect matching wires (black to black, white to white, ground to ground).
Safety: If you find aluminum wiring, no ground wire, a loose or missing box, or anything unexpected, stop and call a licensed electrician. Some areas also require permits for electrical work, so check your local rules first.
12. Replace kitchen or bathroom faucets
A dripping or corroded faucet signals neglect. A new single-handle pull-down kitchen faucet or a matching set of bathroom faucets makes the room feel updated, and modern WaterSense-labeled models use less water. Shut off the supply valves, disconnect the old faucet, and follow the new faucet’s instructions. Replace the supply lines at the same time.
13. Upgrade window treatments
Investopedia’s original article pointed out that the cheap vertical blinds and paper shades that come with many homes add no value at all. Simple white or light-filtering roller shades, cordless faux-wood blinds or curtain panels hung high and wide make windows look bigger and rooms look finished.
Note: Mount curtain rods 4–6 inches above the window frame and 6–10 inches past each side. The window looks larger and lets in more light.
14. Install a tile or peel-and-stick backsplash
A backsplash gives a dated kitchen a modern focal point for little money. Classic white subway tile or a neutral zellige-look tile has the widest appeal. Peel-and-stick tiles are faster and renter-friendly, but real ceramic tile looks and lasts better if you’re selling.
15. Refresh the landscaping
You don’t need a landscape designer. Pull weeds, edge the beds with a clean line, spread 2–3 inches of fresh dark mulch, trim overgrown shrubs away from windows, and add a few potted plants by the door. Landscaping isn’t a line item in the Cost vs. Value Report, but agents consistently rank it among the highest-impact curb appeal investments (Opendoor).
16. Give the garage door a facelift
Garage door replacement was the top-returning project in the 2025 Cost vs. Value Report at 268% ROI, which tells you how much buyers judge this one surface. If a full replacement isn’t in the budget, clean and repaint the door in a color that matches the trim, add decorative handles and hinges, and replace a worn bottom seal.
Safety: Never adjust or remove garage door springs or cables yourself. They are under high tension and cause serious injuries. A full door replacement is a job for a pro.
Weekend DIY projects (500–2,000$)
These projects take more time and care, but each one replaces something buyers would otherwise budget thousands to fix. Do them only after the cheaper projects above are finished.
17. Paint the kitchen cabinets
If your cabinet boxes are solid but the finish is dated, paint delivers most of the visual change of new cabinets for a fraction of the cost. It’s also the logic behind the minor kitchen remodel, one of the few interior projects that returned more than its cost (113%) in the 2025 Cost vs. Value Report: update the surfaces, keep the layout.
- Remove doors, drawer fronts and hardware. Label each piece with tape so it goes back in the same spot.
- Degrease everything with a TSP substitute, then scuff-sand with 180–220 grit.
- Prime with a bonding primer.
- Apply two thin coats of a cabinet-grade enamel with a foam roller and a quality brush, sanding lightly between coats.
- Let the doors cure several days before rehanging. Rushing this is the most common reason painted cabinets chip.
Pro tip: Pair painted cabinets with the new hardware from project 10 for the full effect.
18. Install luxury vinyl plank (LVP) flooring
Worn or stained carpet is a red flag for buyers. Click-lock LVP is waterproof, scratch-resistant and floats over most existing hard floors, so it’s one of the most DIY-friendly floor upgrades. Let the planks acclimate in the room for 48 hours, stagger the seams, and leave the expansion gap the manufacturer specifies at every wall.
Pro tip: Buy 10% extra for cuts and mistakes, and keep a spare box for future repairs.
19. Replace a bathroom vanity
A new vanity with an integrated top, a modern faucet and a new mirror can make an old bathroom feel recently renovated. Choose a vanity the same width as the old one so the flooring and wall don’t need patching, and match the plumbing location to avoid moving drain lines.
20. Add attic insulation
This is the least glamorous project on the list and one of the most practical. The EPA estimates that homeowners save an average of 15% on heating and cooling costs, or 11% on total energy costs, by air sealing and adding insulation in attics, crawl space floors and basement rim joists (ENERGY STAR). Many home improvement stores lend a blower free with a minimum purchase of blown-in insulation.
- Check your current depth. If you can see the tops of the floor joists, you need more.
- Seal air leaks first: gaps around plumbing pipes, wiring holes and the attic hatch.
- Keep insulation away from recessed lights not rated for contact (IC-rated) and from soffit vents. Use baffles to keep vents clear.
- Blow insulation to an even depth that meets the recommended R-value for your climate zone.
Safety: Wear a respirator, goggles and long sleeves. Step only on joists, never on the drywall between them. If you see vermiculite insulation (grayish-brown, pebble-like), stop: it may contain asbestos and needs professional testing.
21. Add closet and garage storage systems
Storage is one of the most desirable features in any home. Installing extra shelves in a bedroom closet, adding garage storage, or putting another cabinet in the kitchen are cost-effective ways to raise appeal (HousingWire). Modular wire or laminate closet kits and wall-mounted garage track systems install with a drill, a level and a stud finder.
Pro tip: Before listing, empty half of every closet. Organized, half-full storage tells buyers there’s room to grow.
Smart and energy-efficient DIY upgrades
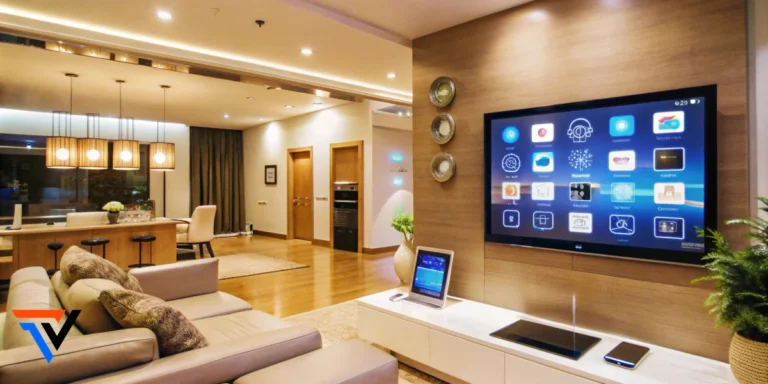
Smart home features have moved from luxury to expectation. Industry forecasts from the NAHB expect smart appliances, integrated security and automated lighting to become baseline homeowner expectations in 2026 (Porch Group Media). The four upgrades below are cheap, install in hours, and give you something specific to mention in a listing.
22. Install a smart thermostat
An ENERGY STAR certified smart thermostat saves the average home about 8% on heating and cooling costs, or roughly $50 a year (ENERGY STAR). Many utilities also offer rebates on certified models, so check your utility’s website before you buy.
- Turn off power to the HVAC system at the breaker.
- Photograph the existing wiring and label each wire with the stickers included in the box.
- Check whether you have a C-wire (common wire). Most smart thermostats need one or include an adapter.
- Mount the new base, connect the labeled wires, restore power and run the app setup.
Pro tip: Before buying, enter your current wiring into the manufacturer’s online compatibility checker. It takes two minutes and prevents returns.
23. Add a video doorbell and smart lock
Security is one of the most practical smart upgrades, and both devices sit at the front door, where buyers form their first impression. Battery-powered doorbells need no wiring. Most smart deadbolts replace a standard deadbolt with a screwdriver and fit the existing holes.
Pro tip: Choose a lock that also has a physical key or keypad backup, and a doorbell that works without a paid subscription for basic alerts. Buyers worry about devices they can’t control.
24. Add smart dimmers and motion-sensing exterior lights
Smart dimmers in the kitchen and living room let you set scenes from a phone or voice assistant. Motion-activated LED lights over the garage, driveway and back door improve safety and deter intruders. Smart bulbs are the no-wiring alternative.
Safety: Switch replacement means working with household wiring. Turn off the breaker, test with a voltage tester, and check whether your switch box has a neutral wire, which many smart switches require. Call an electrician if you’re unsure.
25. Install water leak sensors or a smart water shutoff
A hidden leak under a sink or behind a water heater can cause thousands of dollars of damage before anyone notices. Wi-Fi leak sensors (15–40 each) sit on the floor near the water heater, washing machine, dishwasher and sinks, and alert your phone the moment they get wet. A smart shutoff valve on the main line goes further and closes the water supply automatically.
Projects to leave to the pros
Some projects look DIY-friendly on video but can lower your home’s value, fail inspection or hurt you if done wrong. Hire a licensed professional for these:
| Project | Why to hire a pro |
| New electrical circuits, panel work, rewiring | Unpermitted electrical work is dangerous and can lower resale value (AAA) |
| Gas lines and gas appliances | Leak and fire risk; permits required almost everywhere |
| Moving plumbing drains or supply lines | Hidden leaks cause mold and failed inspections |
| Roofing | Fall risk; poor flashing leads to leaks and voided warranties |
| Garage door springs and replacement | Springs are under high tension and cause serious injuries |
| Removing walls | Could be load-bearing; needs an engineer’s check |
| Driveways and sidewalks | Need specialized machinery and skills (AAA) |
| Large decks | Usually need permits and structural knowledge |
DIY mistakes that lower home value
- Over-improving for the neighborhood. If homes near you sell for $350,000, a $60,000 kitchen won’t return $60,000. Buyers compare your home with what else is available at that price (Opendoor).
- Choosing personal finishes. Bold paint, murals and niche features appeal to you, not the average buyer.
- Leaving projects half-finished. An unfinished backsplash or missing trim looks worse than the original. Finish one project before starting another.
- Skipping permits. Unpermitted work can surface during inspection or appraisal and delay or kill a sale.
- Cheap materials in visible places. Spend on what people touch every day: faucets, door handles, cabinet pulls, flooring.
- Sloppy finishing. Paint on the ceiling, uneven caulk lines and gaps in trim tell buyers the rest of the work may be careless too.
How to choose your projects: a plan by goal
Your timeline decides which projects make sense. Pick the row that matches your situation and work through the projects in that order.
| Your situation | Focus on | Start with projects | Skip for now |
| Selling in the next 3 months | First impressions and fixing visible defects | 1, 2, 3, 6, 7, 8, 9, 15, 16 | Flooring, insulation, smart devices |
| Selling in 1–2 years | Kitchen and bath refresh plus curb appeal | 9, 10, 11, 12, 14, 17, 18, 19 | Anything highly personal |
| Staying 5+ years | Comfort, lower bills and protecting the home | 4, 5, 8, 20, 21, 22, 23, 25 | Trend-driven finishes you may tire of |
Frequently asked questions
What DIY project adds the most value to a home?
Fresh neutral interior paint and curb appeal work (front door, landscaping, pressure washing) add the most value for the money. Among larger projects, garage door replacement had the highest return in the 2025 Cost vs. Value Report at 268%, but it’s best done by a pro.
What is the cheapest way to increase home value?
Fix small visible defects. New caulk, clean grout, matching switch plates, LED bulbs and a painted front door together cost under $300 and remove the signs of neglect that make buyers lower their offers.
Do DIY projects really increase home value?
Yes, when they’re finished to a professional standard. A well-done paint job or hardware swap makes a home look move-in ready. A sloppy or unpermitted DIY job can lower value and cause problems at inspection.
How much should I spend on improvements before selling?
Start with a budget for repairs and cosmetic fixes, not renovations. Fix anything an inspector would flag first, then spend on the cheap, visible projects in this guide. Ask a local real estate agent which updates matter most in your specific market.
Final thoughts
The best DIY home improvement projects that add value aren’t the biggest ones. They’re the cheap, visible fixes that make a home look cared for, and the efficient upgrades that make it cheaper to live in. Start with the under-$100 list this weekend, work up to one larger project a month, and finish each one properly before starting the next.
Which project are you tackling first? Tell us in the comments, and bookmark this guide so you can come back to the checklist.